
|
|
|
|
|
|
Important: You must have exclusive access to the database before you can run the Leave Uploader.
The LeaveUploader is included with the Employee Self-Service build.
To start the leave uploader application:
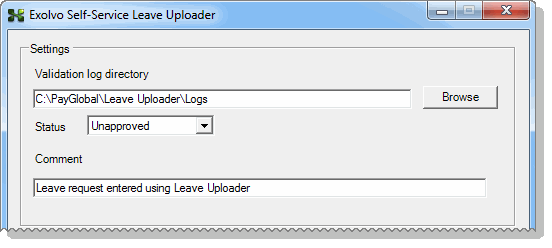
The LeaveUploader opens.
Control |
Details |
Validation log directory |
Type the path where the log files will be written. Alternatively, you can browse to the required folder. |
Status |
The options are: Approved: All requests are automatically approved. Type a message the Comments field (below) so employees, managers and payroll users can see where the request has originated from. For example, "Leave request entered using Leave Uploader". Unapproved: Each employee's manager (or their delegate) receives the leave requests to approve. Active items are created for the requests, but no emails are sent. Unapproved leave requests are not displayed in PayGlobal until the requests are approved. |
Comments |
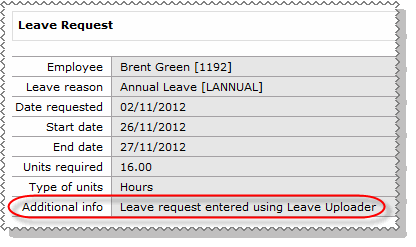
Free text field, which allows you to enter text that is displayed in the following areas: In the Additional info field when an employee views their approved request on the View leave request tab in ESS.
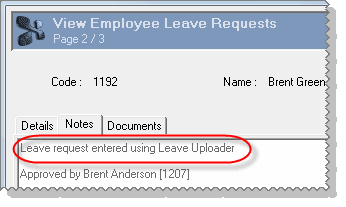
On the Employees | Payroll | Leave | Leave Requests tab | Employee Leave Requests | Notes tab in PayGlobal.
|
Now you need to complete the Upload leave section of the form.
You should always use the Validate Only option to check that the file will be uploaded correctly, and then the Validate & Upload option to upload the file.
Use the Validate Only function to validate the data before you upload it to PayGlobal.
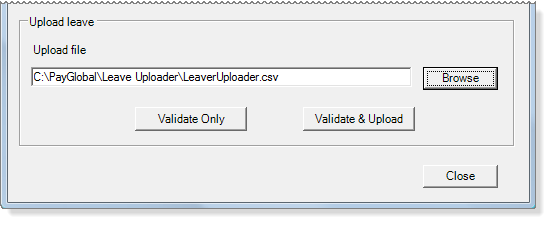
The progress bar appears as the Leave Uploader validates the information in the CSV against PayGlobal and ESS. If there are any validation errors, then the following message appears.
Validation failed: There were validation errors found in the upload file. Would you like to view the log file?
For a full list of validation errors, see Validation Errors.
When validation is complete, the following message appears:
Upload validation complete: No errors found in the upload file.
You are now ready to upload the leave requests to ESS.
When the upload is complete, the following message appears: Upload successful.
 |
Topic: 40359